I recently received a notice about a new blog and found that it is exactly what we women need....
A blog about hair, clothes, skin products, boots, and just how to look nice without breaking the bank! This blog is authored by a group of women who know how to keep fashion real. Let's be honest, who can afford to buy new designer shoes and clothes at the start of each season?!
All Things Chic
Visit their site to see what I am talking about, but I can tell you this...if you like shoes you'll like this blog. Okay, so maybe it's about more than shoes...just go see for yourself.
Plus, they regularly post "what I wore...." and it gives you a look at how to look great with just a regular mommy wardrobe.
And they have great hair tips....
Saturday, February 26, 2011
Tuesday, February 22, 2011
How to Add Bling to Shoes- for cheap!
I am so excited to share this project with you. It is darling and has brought lots of joyful sounds to our household!
My daughter wanted Sketcher Twinkle Toes for her birthday and I just wasn't finding any for a great price. So I decided to make them.
If you go to Old Navy or Children's Place they often clearance their canvas shoes for just a few dollars.
Here's what I bought:
Old Navy- Shoes
Joann's- 3mm Rhinestone's, Jewel-it Glue & Fabric paints (use a compound instead of Jewel-it*)
Dollar Store- Glitter laces
Because I didn't have time to bargain shop...her birthday is this week...I ended up spending $15 (still half the retail price).
1) Let's get started with the rhinestones:
Make sure you have everything together before you start.
You will need:
rhinestones
glue
a plate
tweezers
a piece of paper/plastic
a toothpick
a pen
With the pen mark the spots where you want to place the rhinestones.
Squirt some glue on the paper/plastic.
Get a dot of glue on your toothpick and place it on one of the marks you made (don't get too much glue or it will squeeze out from the sides of the rhinestone).
With the tweezers pick up your first rhinestone and place it on the mark. Gently press it into place.
Repeat with all the rhinestones. Let dry for 24 hours.
2) Now let's move on to the fabric paint:
You will need:
fabric paint (I just used two colors of glitter paints)
Paint the designs you want and let them dry overnight.
I painted around the eyelets and then simply filled in all the green and pink hearts with glitter.
3) Test the stones:
Before you add the laces you'll want to shake, knock, tap and rub the rhinestones to make sure they are there to stay. If any fall off, now is a good time to replace them (rather than in a few days when you've put all the supplies away)!
4) Finish them off by adding the glitter laces.
I was amazed at how dramatic the laces made them look!
VOILA!! Easy, cheap, fun, cute...blinged shoes!
*I would recommend a compound instead of the Jewel-it glue. Some of the jewels fell off on the first wear and need to be glued with something stronger.
Chocolate Chip Cookie Idea
This week I was talking to a friend and told her about my chocolate chip cookie habit. She thought it was an ingenious idea (which surprised me since it is something my mom did all my life!).
Basically, I make my favorite recipe...I got this from a college roommate (Thanks Jenny!!) and it is the BEST! Then I cook two dozen cookies and make a log with the remaining dough and wrap it in plastic wrap. The log goes into the fridge where the children can cut slices for the occasional cookie dough craving, and if we have last minute visitors I can bake a couple dozen fresh cookies for them.
So here you have my all-time favorite chocolate chip cookie recipe...
Delores' Chocolate Chip Cookies
1 Cup Butter
1 1/2 Cups Brown Sugar
1/2 Cup White Sugar
2 Eggs
1 tsp. Baking Powder
3 Cups Flour
1/2 tsp. Salt
Milk Chocolate Chips
Cream butter, sugars, and eggs. Add the remaining ingredients and mix until it all sticks into a large ball. Drop by spoonfuls onto a baking sheet. Bake at 350 for 10 minutes. Do not over-bake.
Enjoy!
Wednesday, February 16, 2011
$5 Barbie and Ken Set
**Ended February 21st**
This is a great deal in honor or Valentine's Day! Barbie and Ken "together again" for just $5.
The "She said Yes" set is very basic but an easy way to get two dolls.
Places to purchase...
Amazon $5 Barbie and Ken
Target $5 Barbie and Ken
Monday, February 14, 2011
A Man's Valentine's Day
So this morning I opened my laptop and my first thought was, "what is going on here?!"
Then I noticed all the little hearts Jesse painstakingly cut out and wrote messages on...
What a nice man!
Here are the goody bags he is taking to the ladies at work...
(I dipped cherry juju hearts in chocolate... mmmm)
and here's what he got from me....Swedish Fish are his favorites!
(except his isn't nearly this cute because I slapped it together at midnight last night and couldn't find all the stuff for it!)
¡¡happy valentine's day everyone!!
Saturday, February 12, 2011
When is Spring?
The sun is shining, the windows are open, the birds are chirping and Dallin is yelling chirp-chirp to the chickens (in a very high-pitched voice, I might add). It is a fresh breath of Spring air we are breathing as we so happily welcoming the needed warmth!

Yes! We think 37 degrees is warm after the 20 below's we've been having this Winter!!
The children have asked me many times, "When is Spring?". They are happy that our streets are no longer covered in 4 inches of ice. We are hopeful that they might get a little bike riding in before May this year.
And so, I decided it was the perfect day to take pictures of Ashley in her baptism dress. This was my baptism dress. I was pretty excited when she chose to wear it over a brand new dress I offered to buy her. I mean... I'm not going to make my girl wear heirlooms but I sure love that she is making that choice all by herself!
Now, heirlooms aside...I am especially happy that she has brought such a strong spirit into our home as she has prepared for her baptism this past year. Her personal scripture study has helped us with family scripture study. Her questions about fasting, prayer, the atonement and so many other gospel topics have inspired better Family Home Evenings. I feel blessed to have her in our family and know that she is choosing the path God would have her chose.
Now, heirlooms aside...I am especially happy that she has brought such a strong spirit into our home as she has prepared for her baptism this past year. Her personal scripture study has helped us with family scripture study. Her questions about fasting, prayer, the atonement and so many other gospel topics have inspired better Family Home Evenings. I feel blessed to have her in our family and know that she is choosing the path God would have her chose.
Here is a picture of me (27 years ago)....
And her (today)...
*I will post a picture of her with Jesse and me after her baptism.

Wednesday, February 9, 2011
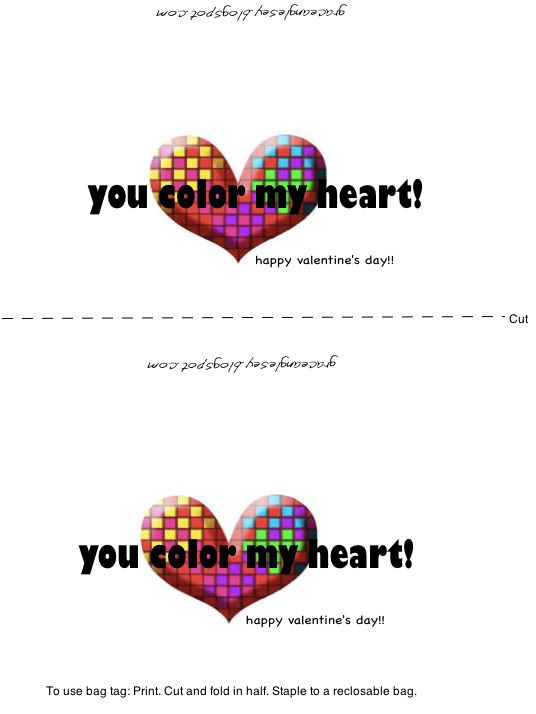
Valentine Bag Tag
Tuesday, February 8, 2011
Valentine Candy Heart Card
I made this for Jesse and just loved Ashley's reaction as she read it! You know...embarassed, shy, giggly, and all that cuteness!!!
Her voice got higher and higher pitched with the words of each candy heart.
This is what it says:
HI LOVE
UR CUTE MY MAN
BE GOOD to me on our HOT DATE.
Some LOVE TALK will make it a GR8 DATE!
HOLD ME for a MEGA KISS!!!
XOXO
4 EVER
I'm sure you can imagine how the words "MEGA KISS" threw her into a hot flush!
Man I love that girl!!
Monday, February 7, 2011
Favorite Family Recipes
I have a large family of wonderful cooks and thought it was a little selfish to keep all our family secrets to ourselves...
So, here you have it...a blog with all our favorite family recipes. It is a work in progress as we have hundreds of recipes!

haha! Don't you love my pig?
What are your favorites? Brownies or pie? A special sauce or an all american hamburger? I would love it if you shared your favorite recipes with us too!!

So, here you have it...a blog with all our favorite family recipes. It is a work in progress as we have hundreds of recipes!


Saturday, February 5, 2011
Funny Children
I just love the way children think, the way they learn, and the way they grow.
I forgot to tell the lady at McD's no onion for the kiddos. So...
Jaden opened his hamburger and said, "Mom, it has onions on it!"
Thinking on my toes I said, "Good thing almost-six-year-olds like onions, huh?"
He said, "YEP!" and took a huge bite!!!
FYI: Ashley tried the same trick on me, and my response was the same. Her answer..."Yep!" and started eating!!
So my question to you is:
Will you share your funny children stories with me? I could so use a laugh!!
Tuesday, February 1, 2011
Heart Shaped Crayons
For this fun project you can use up all your crayon pieces!
Simply peel your old crayons and sort them into colors:
Place them in your molds* (Do Not Forget To Spray The Molds First!!....I did the first time- talk about hard to get out!). Heat the oven to 225 and bake just until melted (about 8 minutes)- place the molds on a cookie sheet for stability:
TIP: This part is a little tricky, because if you melt them too long the wax and color separate (it is better to have some chunks still in there). Also, it helps to use only one brand of crayon as they all have different levels of waxiness.
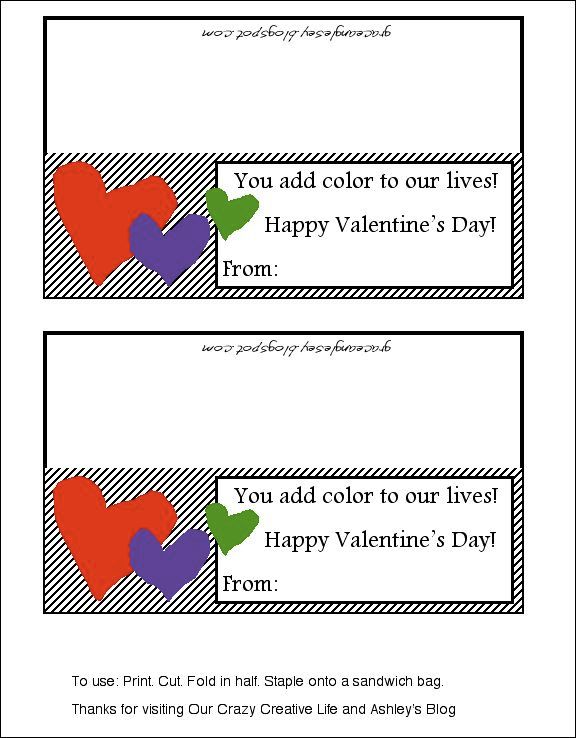
Let the crayons cool completely before removing them. Then you can line 4 in a snack size ziplock bag and staple a tag* to the top (I made one for my kids and you are welcome to use it or copy something like it for yourself).
*I bought some cheap silicone molds in the $1 section of Target.
*Here's the tag I am using- click on it for a full size printable image:

Subscribe to:
Comments (Atom)


